
So, you’re ready to dive into the quest to rescue Mayrina and confront the mysterious Auntie Ethel in Baldur’s Gate 3. Let’s break it down for you with all the choices and consequences.
Meeting Mayrina and the Feuding Trio
To start this quest, head west from the Druids’ Grove until you reach a stone bridge, then head south. You’ll stumble upon a trio in the middle of an intense argument. Among them, two men are confronting an elderly woman by the name of Auntie Ethel, blaming her of their sister’s disappearance.

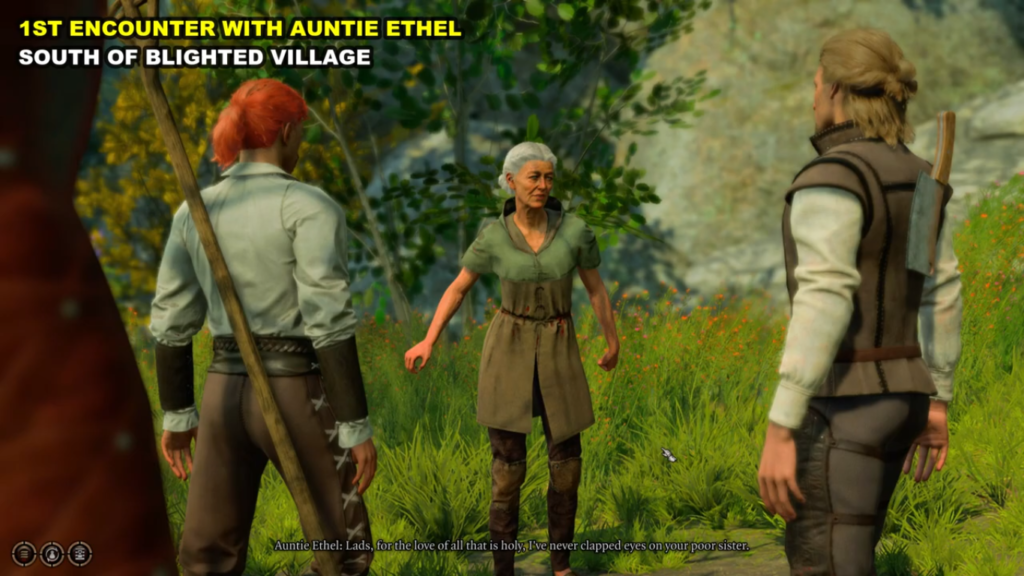
To trigger the quest, side with the two upset brothers. Auntie Ethel will soon reveal herself to be more than just a sweet old lady, and she’ll vanish. Following this revelation, talk with the two brothers, who will explain the situation and then agree to rescue Mayrina from Auntie Ethel’s clutches.
Note: In case you side with the old lady or decide not to side with anyone, you won’t be able to trigger this quest.
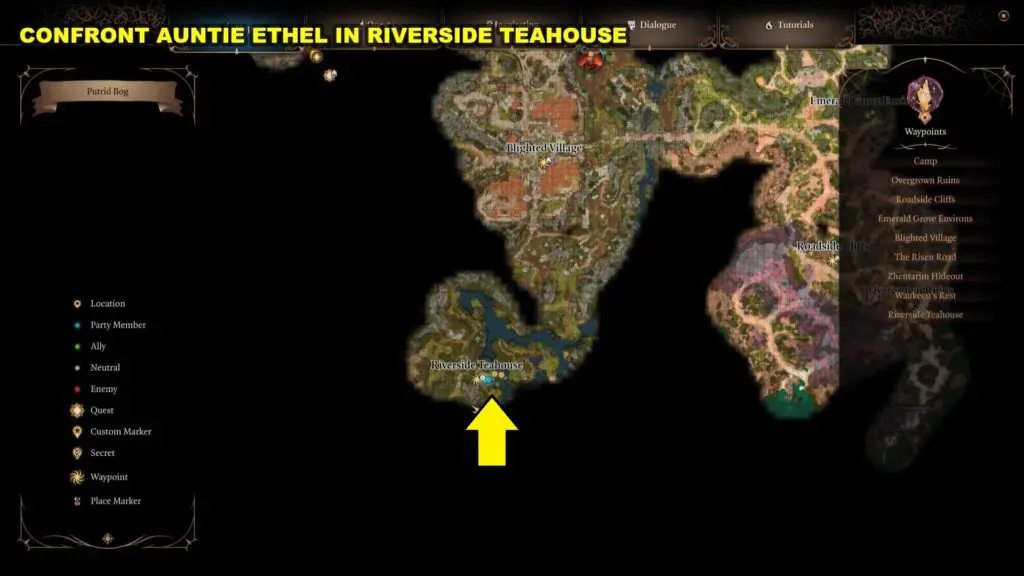
Inside Auntie Ethel’s Teahouse
Upon entering, you’ll find Auntie Ethel keeping Mayrina captive. At this time Auntie Ethel’s initial response is influenced by your prior interactions with her.

You can choose to inquire about Mayrina, but Auntie Ethel might respond with a threat, cautioning you not to meddle in her affairs. If you persist or inform Mayrina about her brother’s fate, Auntie Ethel will reveal her true form in the process. She then disappears behind the furnace, unveiling her hidden location.
Alternatively, if you refrain from discussing Mayrina and instead inquire about the procedure for removing the parasite, accepting it will entail the loss of one of your eyes. However, this sacrifice will not result in the removal of the parasite.
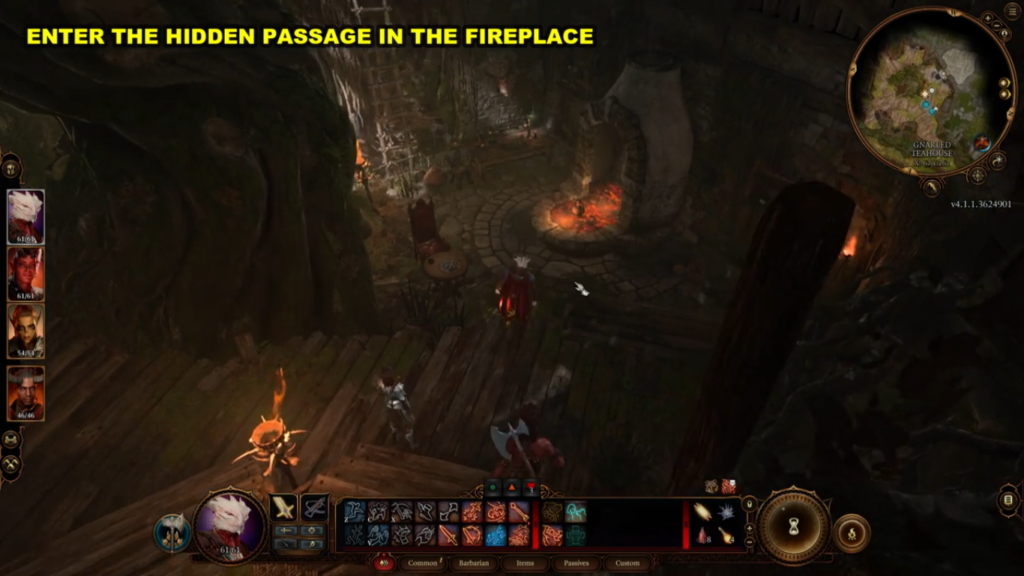
Exploring the Caves Under Auntie Ethel’s Abode
Enter the firepalce and as you proceed further into the Overgrown Tunnel, you will encounter the Gnarled Door. This door will project haunting visions of individuals who fell victim to the hag’s curse but remain firmly shut. To breach this Gnarled Door, you must equip the Whispering Masks located from an adjacent table. Equipping one of these masks on any of your characters will grant you access through the Gnarled Door.
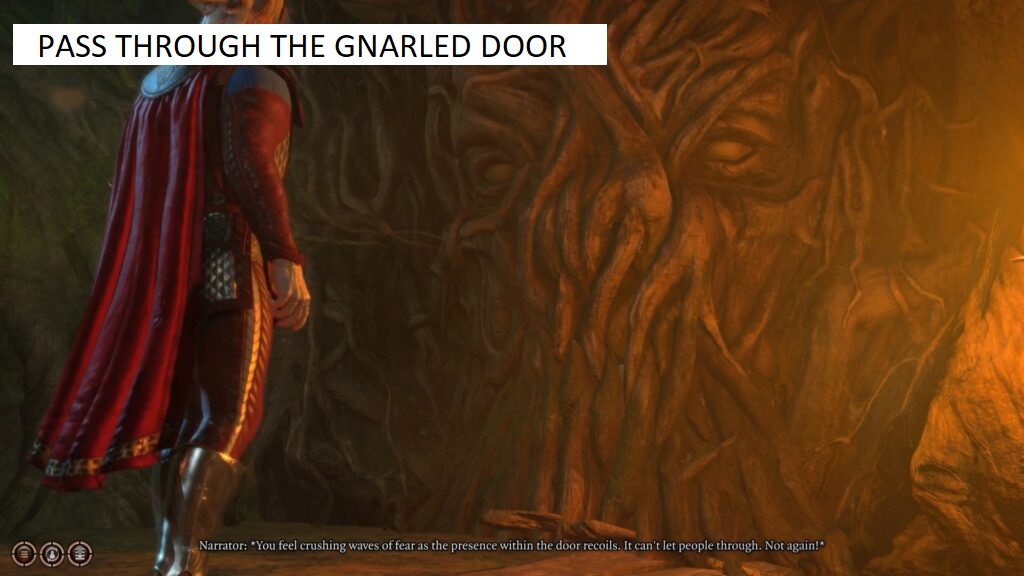
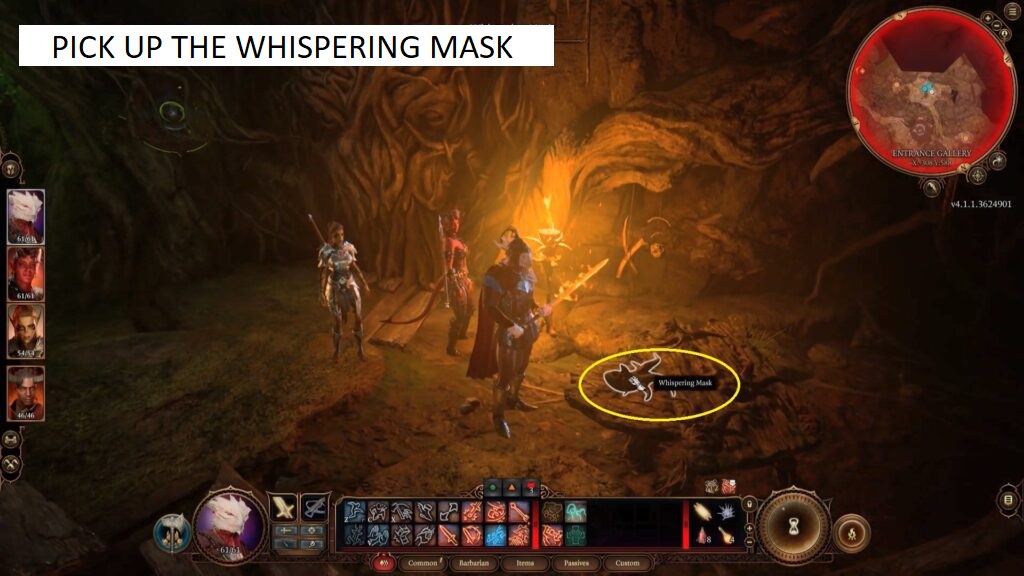
You can pass by positioning your camera beyond the door and clicking on the area on the opposite side.
Removing The Whispering Mask
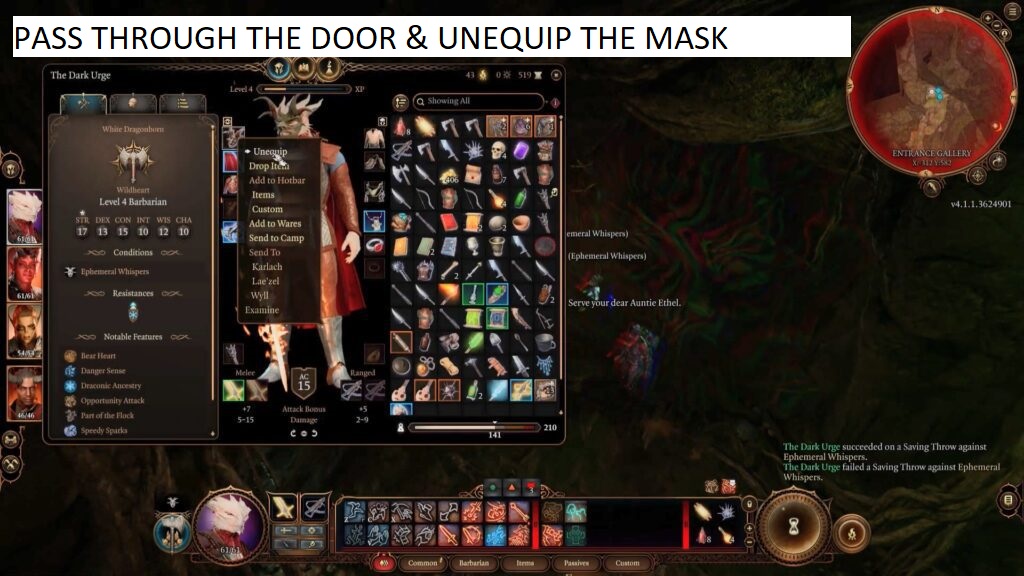
Once you’ve traversed the Gnarled Door, it’s important to promptly remove the Whispering Mask. Auntie Ethel possesses mental influence over these masks. Failure to remove the mask promptly may result in her compelling you to attack your own teammates.

Navigating the Hazardous Caves
Continue forward, and when you reach a waterfall, jump through to the other side. The next room features gas traps. Wear a mask and navigate the room safely, then remove it immediately afterwards.

Rescuing Mayrina – Confronting Auntie Ethel for the First Time
In the next chamber, Mayrina is confined in a large cage alongside Auntie Ethel. Start a fight with Auntie Ethel. She will summons three duplicates of herself, each fading upon sustaining any damage. The cage holding Mayrina will also be engulfed in flames, risking her life if the cage’s HP reaches zero.

To save Mayrina, assign someone to operate the control orb on the far side of the room. This action will rescue her from the cage. Auntie Ethel may attempt to deceive you by making Mayrina appear as an illusion. If in doubt, refrain from harming her or use non-lethal attacks (available in your passive bar), as killing her will result in quest failure, and she cannot be revived.

The Consequences of Your Choices: The Wand and Mayrina’s Fate
After the battle, Auntie Ethel may offer to negotiate her way out of her dire situation, promising an extra ability point if allowed to take Mayrina and flee. You can choose to accept or decline. Once Auntie Ethel departs, speak with Mayrina, who, despite everything, is distraught by the outcome. She had sought to revive her deceased husband and had agreed to Auntie Ethel’s demands, trading her unborn child for the promised resurrection. Mayrina will leave in frustration.

The Cost of Love: Unveiling Mayrina’s Husband
Exploring Ethel’s chamber reveals a wand labelled “Bitter Divorce,” bearing her husband’s name. Utilize the circle of mushrooms at the back of the room to teleport to safety, then present the wand to Mayrina.

Choices and Consequences: The Wand’s Fate
After showing Mayrina the wand, you’ll face three distinct choices:
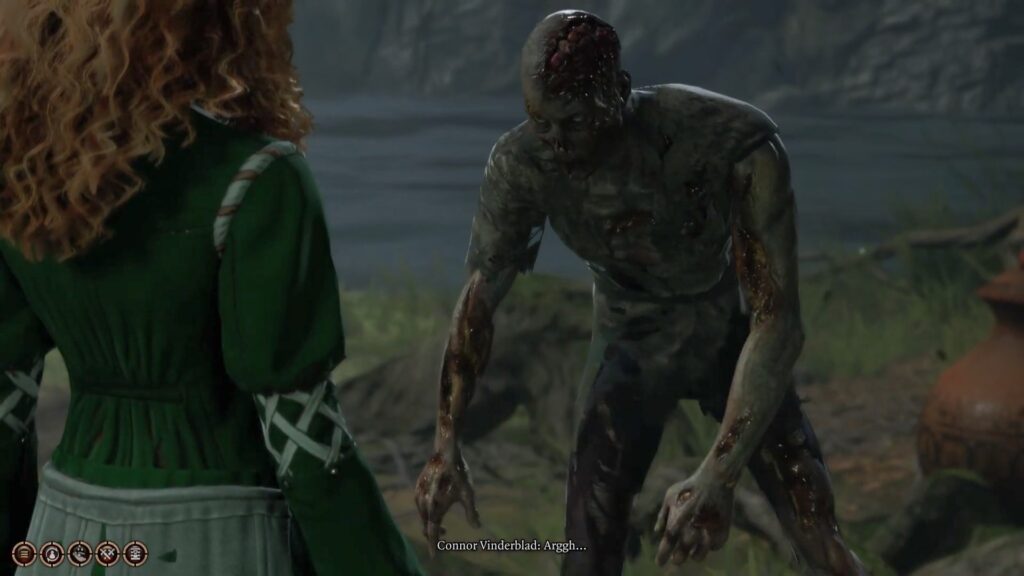
Use the Wand to Revive Connor: If you decide to use the wand, Connor will be revived as a zombie. Mayrina will take him, intending to seek help in Baldur’s Gate. You can also summon Connor using the wand when you require additional combat support.
Use the Wand to Kill Connor: Opting to kill Connor will lead to a battle between him and Mayrina, ending the quest on a tragic note.
Snap the Wand: Should you choose to snap the wand in two, Mayrina will become upset and flee.